If you routinely have to change or modify your Windows configuration, especially for things like printers and networks, you find yourself navigating the Control Panel maze of choices to get to the place where this can be done. This can become tedious and time consuming.
What if you had a place where all these types of changes (and many more) could be easliy, meaning one or two clicks, accessed? The answer is commonly referred to as ‘GodMode’. Personaly I disagree with that term in that it is more like a Super Administrator Control Panel view than anything else. Nonetheless, it is what most folks are calling it.
If you just want the GodMode folder on your desktop, follow these simple three steps:
- Create a new folder wherever you want the GodMode icon to be. Right-click in Windows Explorer, select New, then click Folder.
- Next, rename the folder. You can name the folder anything you like (above it was called God Mode) as long as you add a period followed by this exact text string: {ED7BA470-8E54-465E-825C-99712043E01C}. It has to be that exact string – so make sure you use cut and paste!
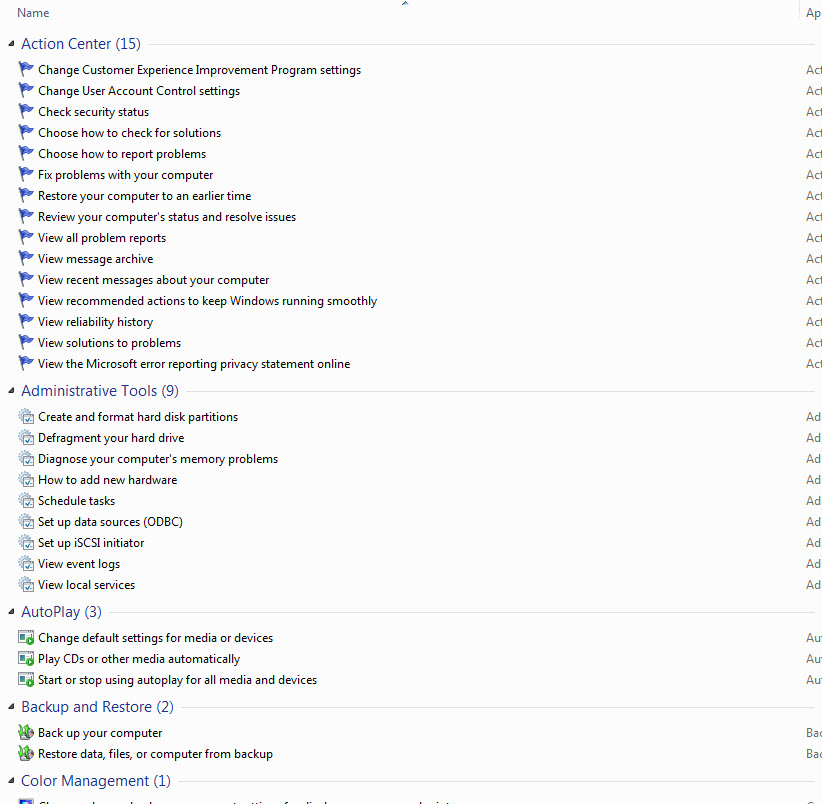
- The folder icon should be replaced by the Control Panel icon, and the folder should now be filled with a variety of tweaks and tools like the screenshot on the right.

Now this is only a partial screen shot, but you can see that all the computer settings in alphabetical order are available from one list in the window, making it super easy to find let’s say Network Settings and jump to what we want to do.
The truth is that there are a number of these types of GodMode folders. Microsoft offers the following batch file/script to create them all:
mkdir “Special Folders
cd “.\Special Folders
mkdir “God Mode.{ED7BA470-8E54-465E-825C-99712043E01C}
mkdir “Location Settings.{00C6D95F-329C-409a-81D7-C46C66EA7F33}
mkdir “Biometric Settings.{0142e4d0-fb7a-11dc-ba4a-000ffe7ab428}
mkdir “Power Settings.{025A5937-A6BE-4686-A844-36FE4BEC8B6D}
mkdir “Icons And Notifications.{05d7b0f4-2121-4eff-bf6b-ed3f69b894d9}
mkdir “Credentials and Logins.{1206F5F1-0569-412C-8FEC-3204630DFB70}
mkdir “Programs and Features.{15eae92e-f17a-4431-9f28-805e482dafd4}
mkdir “Default Programs.{17cd9488-1228-4b2f-88ce-4298e93e0966}
mkdir “All NET Frameworks and COM Libraries.{1D2680C9-0E2A-469d-B787-065558BC7D43}
mkdir “All Networks For Current Connection.{1FA9085F-25A2-489B-85D4-86326EEDCD87}
mkdir “Network.{208D2C60-3AEA-1069-A2D7-08002B30309D}
mkdir “My Computer.{20D04FE0-3AEA-1069-A2D8-08002B30309D}
mkdir “Printers.{2227A280-3AEA-1069-A2DE-08002B30309D}
mkdir “Application Connections.{241D7C96-F8BF-4F85-B01F-E2B043341A4B}
mkdir “Firewall and Security.{4026492F-2F69-46B8-B9BF-5654FC07E423}
mkdir “Performance.{78F3955E-3B90-4184-BD14-5397C15F1EFC}
You can cut and paste the above and inside a folder called Special Folders you will get the entire family of God Mode folders!!
From what I have seen, this works on Windows 8/8.1 as well.

