The dig command, short for “Domain Information Groper,” in Linux or MacOS is a command-line tool used to query Domain Name System (DNS) servers. The command is a lot like nslookup, but at the same time it is different. If you are a Windows user, you have to use nslookup. For a reference on nslookup go here.
The dig command helps in diagnosing DNS issues and retrieving information about DNS records for a given domain or hostname. It is widely used by network administrators and developers for troubleshooting.
Install dig:
On most Unix-based systems, dig is part of the dnsutils package. To install it:
- Ubuntu/Debian:
sudo apt install dnsutils - CentOS/Red Hat:
sudo yum install bind-utils - MacOS: Pre-installed in most cases or can be installed via Homebrew:
brew install bind
Basic Syntax:
dig [@server] [name] [type] [options]Components:
- @server (optional): The DNS server to query (e.g.,
@8.8.8.8for Google DNS). - name: The domain name or hostname to query (e.g.,
example.com). - type (optional): The type of DNS record to query. Common types include:
A: IPv4 addressAAAA: IPv6 addressMX: Mail exchange serverCNAME: Canonical name (alias)TXT: Text recordsNS: Name server records
- options (optional): Additional flags to modify the output.
Examples of Common Use Cases:
- Query the A Record (IPv4 address):
dig example.com AThis retrieves the IPv4 address ofexample.com. - Query the MX Record (Mail Exchange):
dig example.com MXThis retrieves mail server information forexample.com. - Query a Specific DNS Server:
dig @8.8.8.8 example.com AThis queries Google’s public DNS server for the IPv4 address ofexample.com. - Get All DNS Records (ANY type):
dig example.com ANYNote: Some servers restrict responses toANYqueries for security reasons. - Query the NS Records:
dig example.com NSThis retrieves the authoritative name servers forexample.com. - Reverse DNS Lookup (PTR record):
dig -x 8.8.8.8This retrieves the domain name associated with the IP address8.8.8.8. - Verbose Output:
dig +trace example.comThis shows the path of the DNS query, starting from the root servers. - Simplify Output (Using
+short):dig example.com A +shortThis returns only the IP address, making it easier to read.

Output Structure:
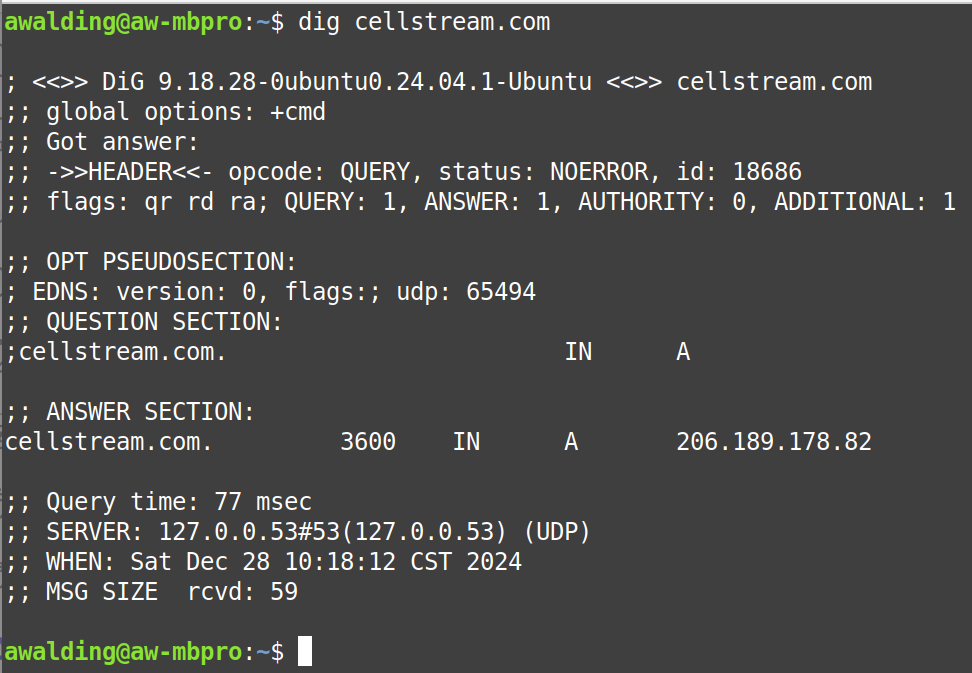
The dig output is typically divided into sections:
- Header: Query details, including flags and response codes.
- QUESTION SECTION: The domain and query type.
- ANSWER SECTION: The result of the query (e.g., IP address, DNS records).
- AUTHORITY SECTION: Information about the authoritative DNS servers.
- ADDITIONAL SECTION: Additional information (e.g., IP addresses of name servers).
Key Options:
+short: Outputs only the essential result.+trace: Traces the query through each DNS server in the resolution chain.+noall +answer: Displays only the ANSWER section.+nocmd: Suppresses the command details in the output.
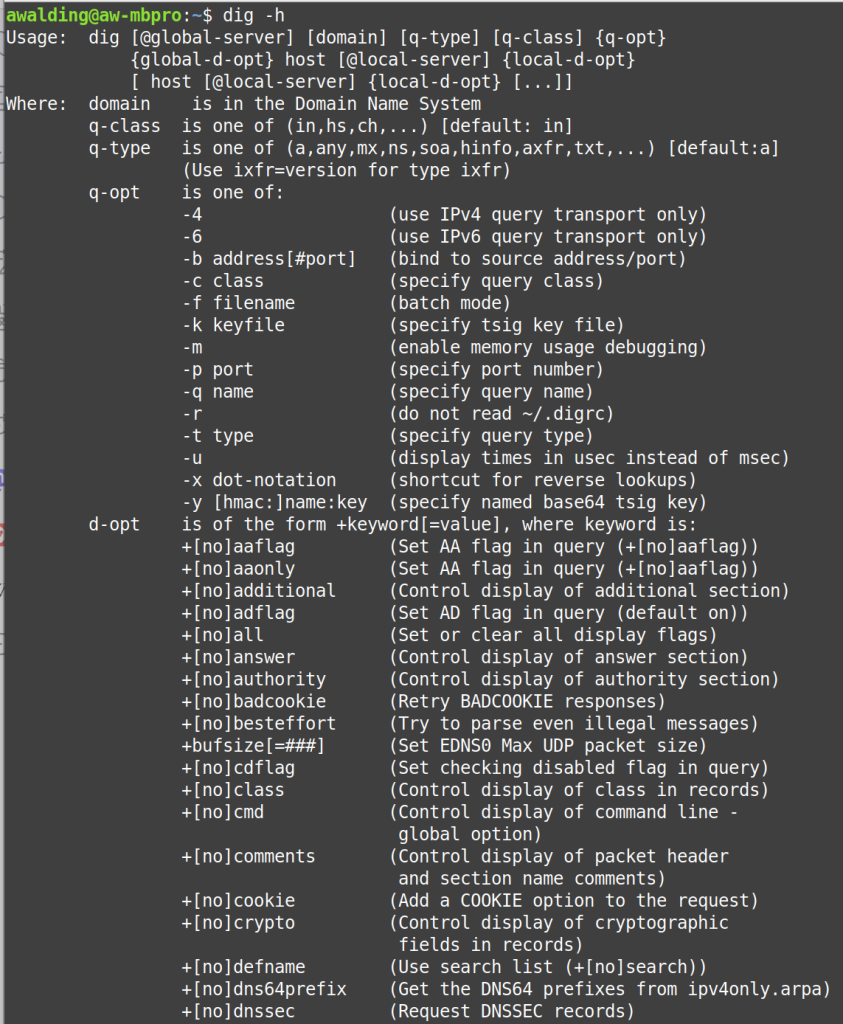
There are many many options you can look at in the command (a partial screen shot below):

Usage Tips:
- Combine
digwithgreporawkto filter results programatically. - Use
+timeoutand+triesto control the query timeout and retries.
The TTL in the dig Output
In the output of the dig command, TTL stands for Time to Live. This is not the same as the IP TTL value in the header of IP tackets.
It is a value in seconds that specifies the duration for which a DNS record can be cached by a resolver or a DNS server. The TTL determines how long a record is considered valid before the resolver must query the authoritative DNS server again for updated information.
Where TTL Appears:
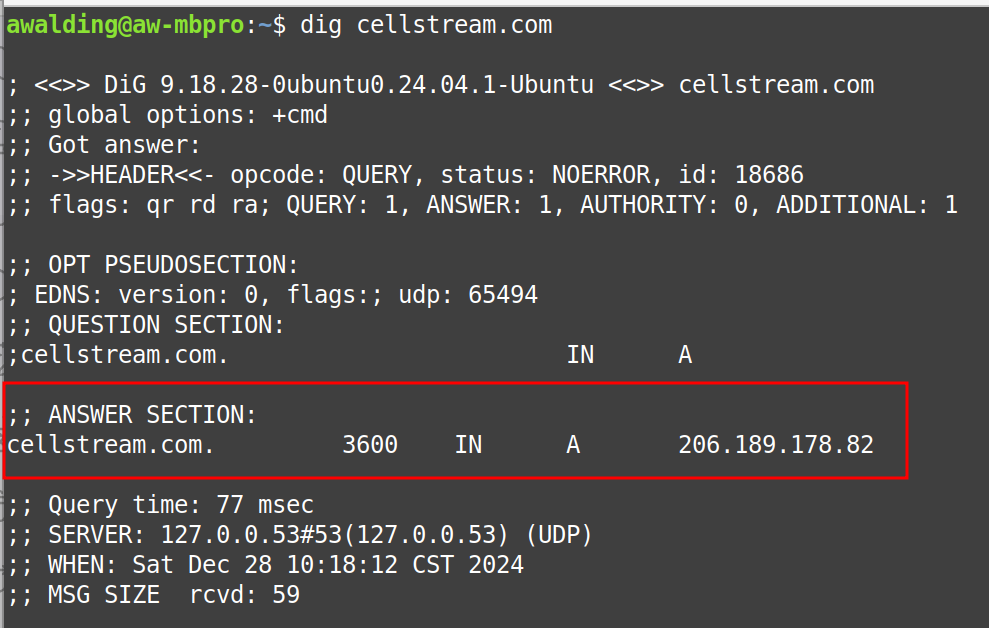
In the ANSWER SECTION of a dig query output, TTL is displayed as one of the fields for each DNS record.
Example dig output:

Here
3600is the TTL value (in seconds).- It means this record can be cached by a resolver for 3600 seconds (1 hour) before being considered stale.
How TTL Works:
- Caching and Performance: DNS resolvers cache records to reduce the load on DNS servers and improve response times for clients. The TTL specifies how long this cache is valid.
- Updates: If a DNS record changes, the TTL determines how quickly the change propagates. A lower TTL ensures faster updates but increases query traffic to authoritative servers.
- Default Values: The TTL is configured by the owner of the DNS zone and may vary for different record types or domains.
Key Points:
- Short TTL: Use a low TTL (e.g., 300 seconds) when records may change frequently, such as during server migrations or IP address updates.
- Long TTL: Use a high TTL (e.g., 86400 seconds) for records that rarely change, to minimize DNS query traffic and improve performance.
- Dynamic Updates: During planned changes, TTL can be temporarily lowered in advance to ensure quicker propagation of updates.
Example with Multiple Records:
;; ANSWER SECTION:
example.com.    300     IN    A    192.0.2.1
example.com.    300     IN    A    192.0.2.2
Both records have a TTL of 300 seconds (5 minutes). After 5 minutes, any cached data for these records must be refreshed.
Checking TTL with dig:
To view the TTL of a specific DNS record:
dig example.com AFor a more concise output with only the TTL:
dig example.com A +noall +answerComments are welcomed below from registered users. You can also leave comments at our Discord server.
If you would like to see more content and articles like this, please support us by clicking the patron link where you will receive free bonus access to courses and more, or simply buying us a cup of coffee!
