|
Check out these great references as well: |
| Our custom profiles repository for Wireshark |
| Our Udemy course on Wireshark |
| Our Udemy course on Wireless Packet capture |
A great question and problem.
The fundamental answer is you can’t. Why? Depends on who you believe.
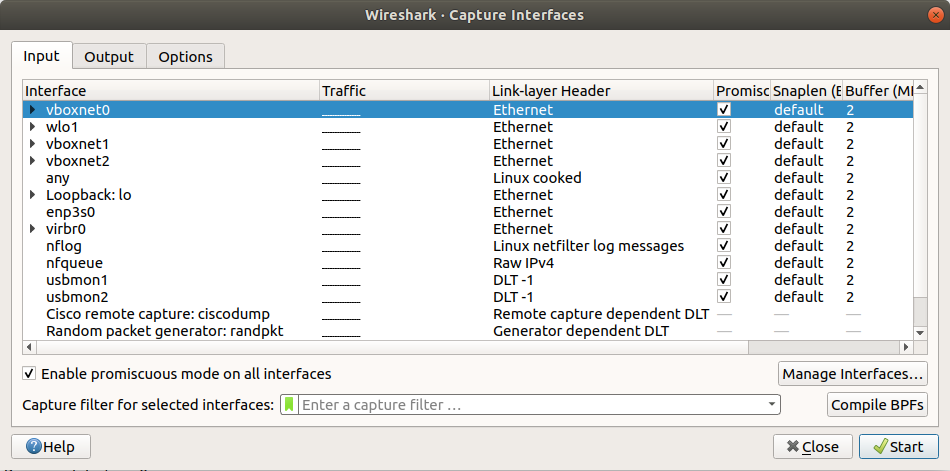
My conclusion is that Wireshark (really dumpcap) has to use either Npcap or Winpcap in Windows or Libpcap in Linux to access the packet data within the stack. With Virtualbox, there is no path to the packet data that dumpcap can reach, even though the VirtualBox networks/virtual interfaces appear. See the vboxnet intefaces I have below (I am showing Linux screen shot first, but it is the same in Windows, shown second):


OK so attempting to do this with Wireshark alone does not work for me.
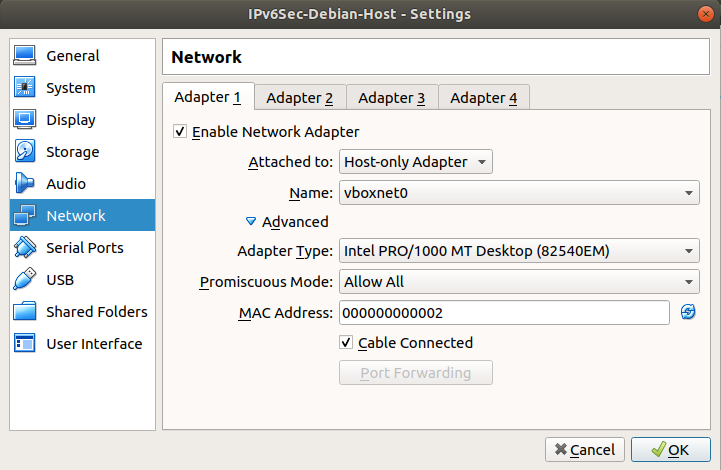
Some web sites say the solution is to make sure that VirtualBox promiscuous mode is turned on in the VM Network settings.
Below I have selected a VM, chosen Settings, then Networking, then Advanced:

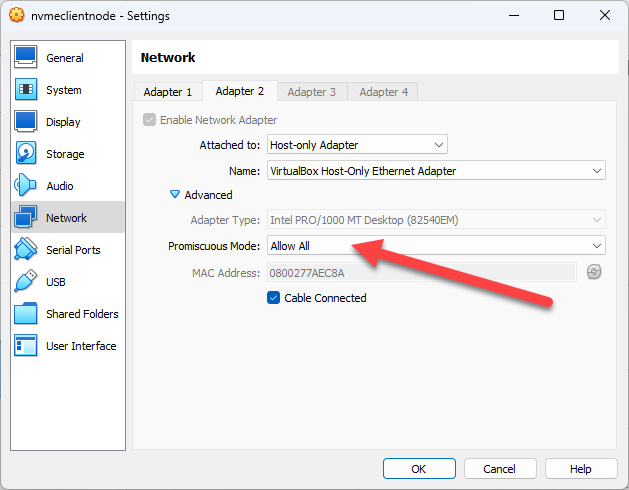
Again same thing in Windows:

In the Promiscous mode – I selected Allow All. Then clicked on OK, and started the VM. It made no difference, I still could not capture this VM traffic on the VirtualBox interfaces in Linux nor in Windows.
A bunch of other sites say to change the Attached to and set a bridged Host Only adapter. But this is also wrong, you can’t do both those things. None of them have screen shots, so that should tell you something too.
Let me just say, that I absolutely hate when you end up running down a rabbit hole like this and there is so much false information, or when all of this is dependent on things no one cares to either a) fix, or b) be honest about. Sorry for the rant.
So how do we solve the problem? Well, it appears the VirtualBox folks know about this issue and they have provided a “work around”.
Basically you have to start the a packet capture from a terminal first, and then start the VM (either from a terminal or from the VirtualBox Manager.
You have to issue two commands: the first starts a packet capture, and the second starts the VM. Two important notes:
- Caution: the capture is raw and can get big quickly. To stop it, you must shut down the VM.
- Caution: the second step of actually starting the VM, in Windows running the latest v7.x VirtualBox, I had to start the VM from the VirtualBox Manager, not a command line.
While this is clunky, it works.
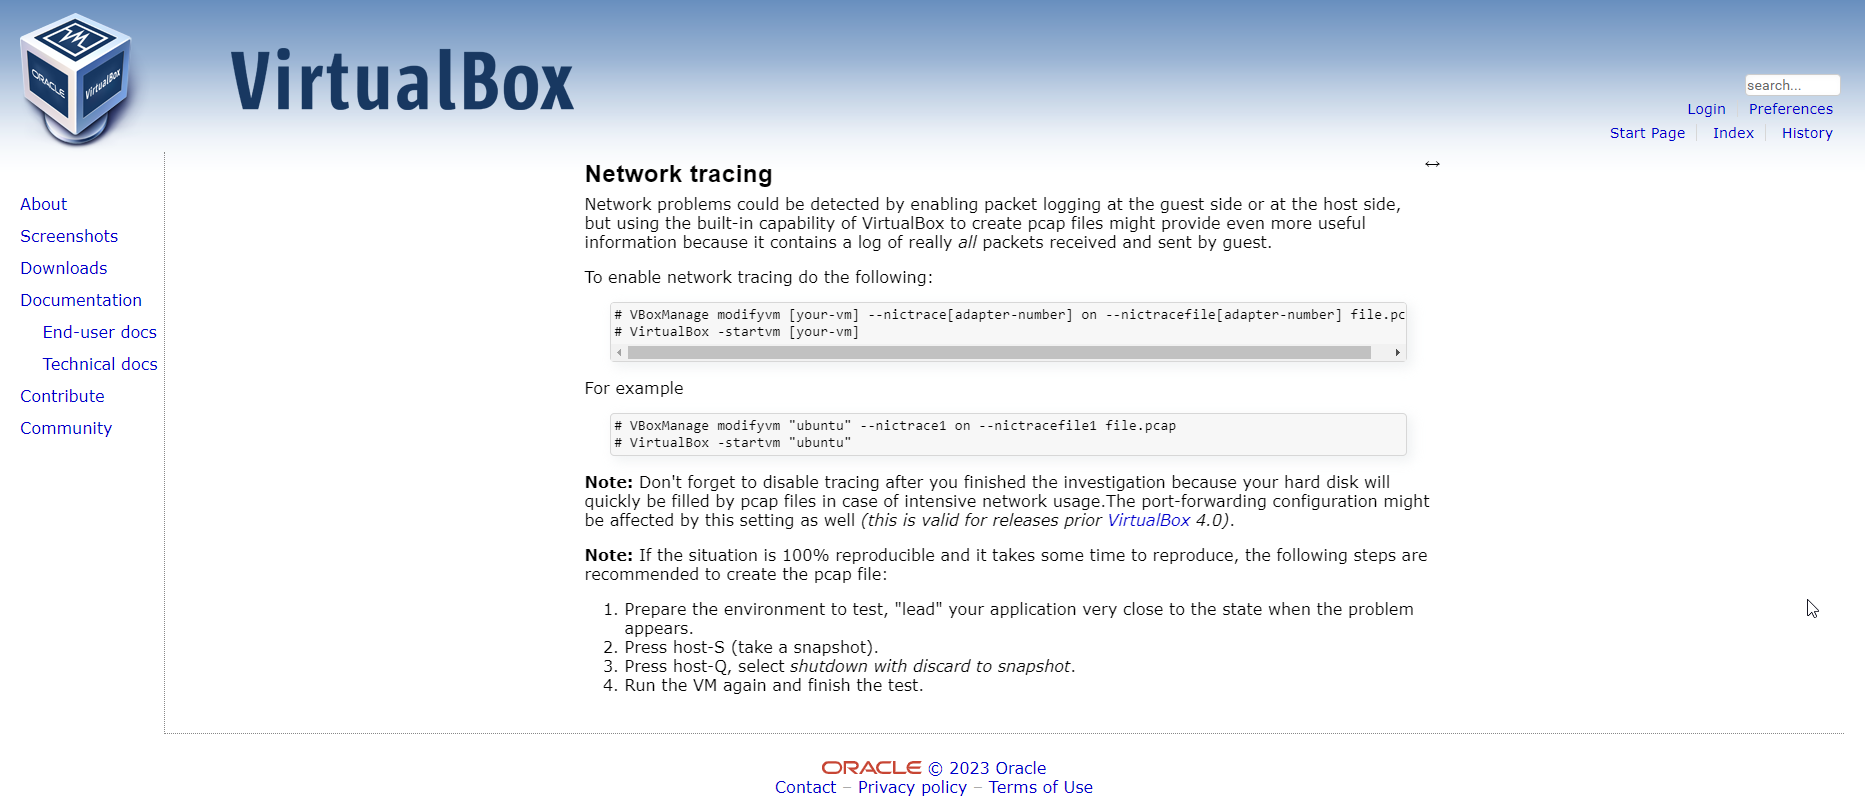
Here is the VirtualBox instruction page which is leaving out a few key details (as usual):

In Windows, I openned a CMD using administrator mode (just in case). Then I changed directory to the /Program Files/Oracle/Virtualbox directory:
cd /Program Files/Oracle/Virtualbox
Then I issued the following command to create the capture file in my Home directory:
VBoxManage modifyvm "VM-name" --nictrace1 on --nictracefile1 /home/amwal/vmcapfile.pcap
The number 1 in both nictrace1 and nictracefile1 refers to the interface on the VM that you want to capture on. So make sure you change that as needed.
Also, make sure that you change the file name every time you try to run the command else you will get an error on VM start up.
Here are the Linux commands I used on my lab network:
VBoxManage modifyvm "IPv6Sec-Debian-Host" --nictrace1 on --nictracefile1 /home/awalding/netlog.pcap
VirtualBox -startvm "IPv6Sec-Debian-Host"
After doing my testing, I was able to open the netlog.pcap file in Wireshark, and I was good to go.
I hope you find this article and its content helpful. Comments are welcomed below. If you would like to see more articles like this, please support us by clicking the patron link where you will receive free bonus access to courses and more, or simply buying us a cup of coffee!, and all comments are welcome!

