As explained in our prior article on QUIC, you may be seeing a lot of QUIC traffic in your packet captures. Assuming you have read that article, and understand that all QUIC traffic is encrypted, you know the only way to see some of the details is using Chrome itself. That does not mean that you can’t use Wireshark as well.
Note: Google originally called this protocol “QUIC” as you can tell by the original logo, but now that original version is referred to as GQUIC, whereas the IETF has chosen to call the newer version they are working on as “QUIC” – confusing – yes – so when I saw QUIC here I am referring to Googles original QUIC protocol.
|
Check out these great references as well: |
| Our custom profiles repository for Wireshark |
| Our Udemy course on Wireshark |
| Our Udemy course on Wireless Packet capture |
First, we have created a QUIC profile for Wireshark. It is in our Profiles repository – you can find that repository here. You will need to download and install that profile in your Wireshark personal configuration.
As you dive deeper into QUIC, you may want to refer to the detailed RFC drafts. Surprisingly there are approximately 30 internet draft specifications deadline with QUIC. You can find those drafts here.
Next, you will want to perform a simple capture on your computer by:
- Start Wireshark on your working Internet interface, making sure the QUIC profile is selected
- Open Chrome, and then going to Google’s home page (www.google.com), and then click on the “I’m Feeling Lucky” button.
- Stop the capture.
Using the profile, click on the Display Filter bookmark, and select the QUIC packets only filter:
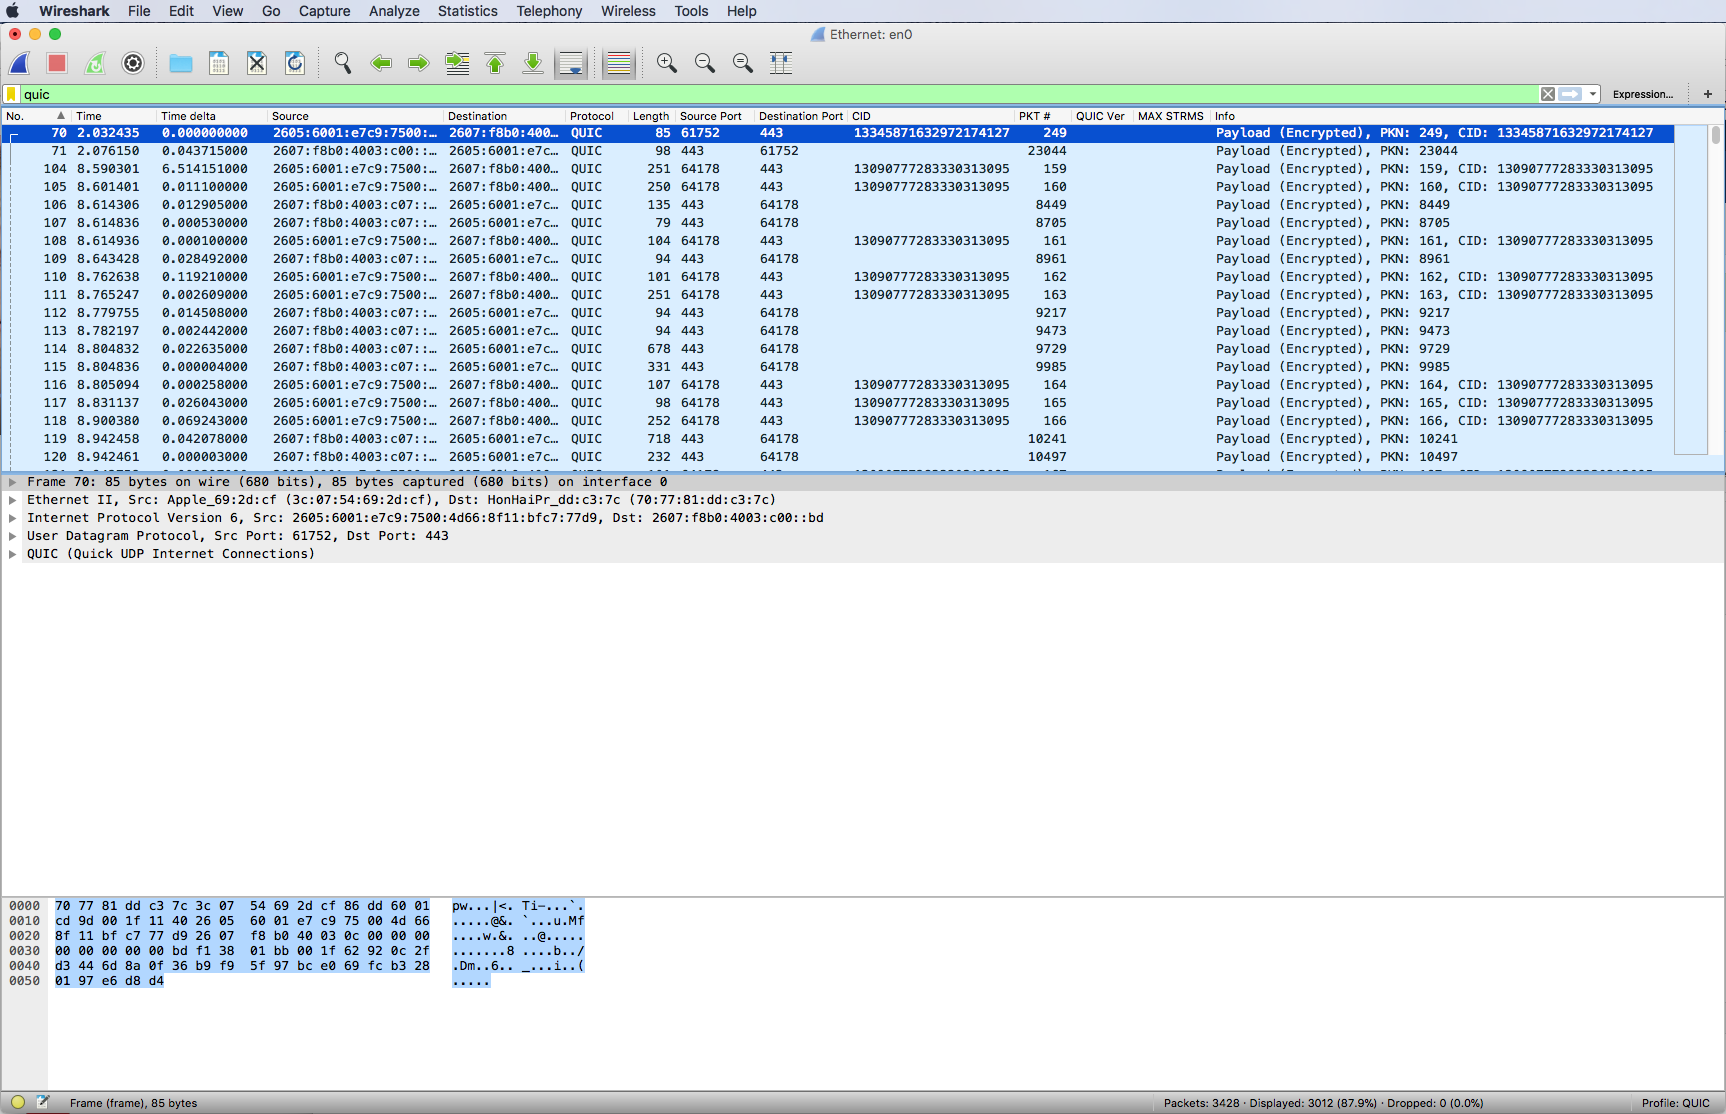
You should now only see QUIC packets. Let’s discuss some of the columns I created (note here – I took the screenshots below before the protocol name changed to GQUIC – so while I updated my profile at the repository, I do not show the updates below – but it is easy to resolve – anywhere it says “quic” – simply change in your mind or on your latest version of Wireshark to “gquic” and you are good):

Knowing the source and destination ports in Layer 4 UDP is important so I have created UDP port columns. QUIC uses the Ephemeral Port range, and it can have ports translated in NPAT without issue. These ports are never the same, so you may find that firewall configuration may need to be flexible here.
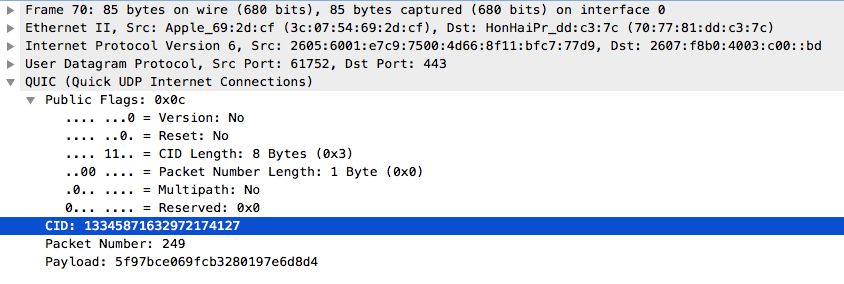
Expand the QUIC header and you should see something like this:

QUIC uses connection identifiers to identify the various streams it is carrying. Therefore I have a column for that identifier. You can filter based on the connection identifiers. There are multiple ways to do this, but one simple way is to click on the column header to sort!
Also there is a packet number that I extract as a column from the QUIC header.
The next thing to look at is once again in the Display filter pick list, it is the filter for QUIC client hello packets. Select it and you should see something like this:

These packets have some clear text that we can examine.
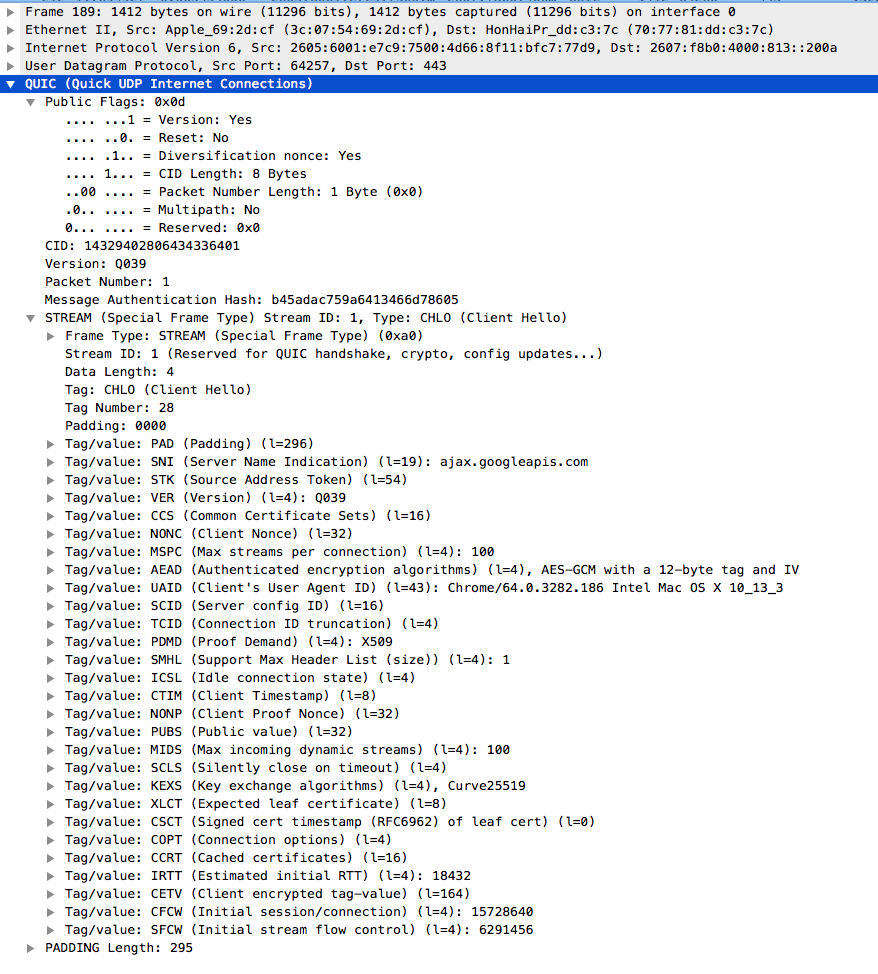
Expand the packet QUIC contents:

These Hello’s define the stream ‘personality’. I align this to the TCP SYN and SYN-ACK options in my mind. What we see is the much more complex and capable stream personality. It is from this format that I have extracted things like the maximum number of streams column and the QUIC/gQUIC version information.
I hope this helps the reader get started using Wireshark and QUIC/gQUIC.
Comments? Questions?
I hope you find this article and its content helpful. Comments are welcomed below. If you would like to see more articles like this, please support us by clicking the patron link where you will receive free bonus access to courses and more, or simply buying us a cup of coffee!, and all comments are welcome!

